

Hands-on - Add USB to Pluto/Flashy oscilloscope
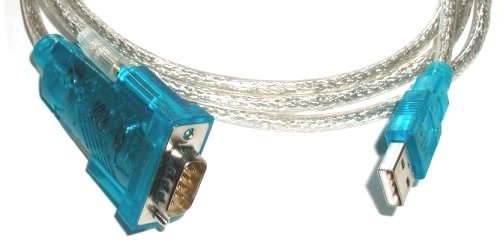
USB-RS232 cable
Using a USB-RS232 cable, it is easy to make the Pluto board USB compliant.
Here we are using a USB-RS232 cable from KNJN.com (see picture below). The cable works great but has the disadvantage of having a case made of molded plastic. As you'll see later on this page, we can pick-up the USB power from the cable once the case has been removed, but the molded plastic is hard to remove. If you have the chance to pick-up a cable, choose one made with a non-molded case. But still pick one with a good quality chipset as some very cheap cable don't work well (the ones based of FTDI chipsets usually work great).
Connecting the cable
That's easy, plug the USB-RS232 cable to the TXDI board, and Pluto becomes USB compliant. Just make sure that the USB cable uses the same COM port than Pluto's software (both can be changed, so you are sure to find a common ground).
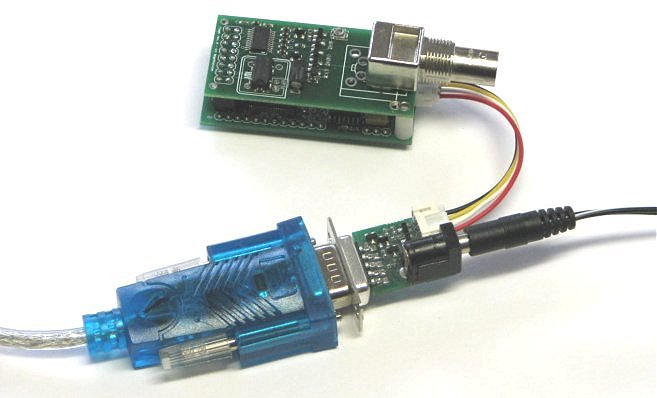
USB power
Now it is tempting to power Pluto/Flash directly from the USB cable. Since the combo consumes only about 100mA, that's no problem. We have to open the USB cable though. Since I have a KNJN cable on hand, I took my cutter and cut patiently into the molded plastic. After a little while, I got to the guts of the cable showing an FTDI FT232BM chip on the top, plus an SP213 on the back.
The 5V power is easy to find, so two wires can be soldered between the USB cable and the TXDI.

Now Pluto is USB-controlled & USB-powered!
Putting everything in a box
Last piece of our masterpiece, let's put everything in a box. One hole in the front for the BNC, one in the back for the USB cable.
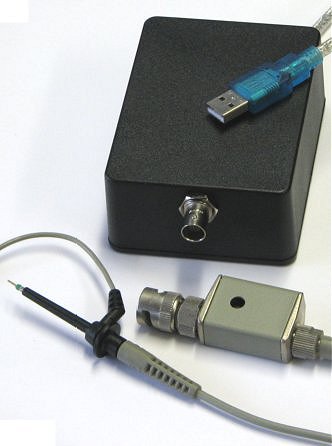
A few advices & ideas:
- Make the USB cable's hole close to the box's cover edge, so that it can slide in when the box is opened, and stays in place when it is closed.
- Make the BNC male connector hole on the other side. If the connector tends to rotate while you insert the BNC female from the probe, simply put a piece of hard material in the box between the connector and the top of the box. That prevents any rotation of the connector.
- The Pluto-TXDI male connector might need to be bent upwards as it is otherwise too close to the box wall.
- You may need two BNC hex nuts to have the BNC not stick out too much from the box (one nut on each side of the box wall).